Applying for a US Passport or Visa with a Disability
Applying for a US passport or any official ID can be a daunting task, but it can be even more challenging when you have a disability. Navigating the specific requirements and ensuring compliance can feel overwhelming. This guide aims to simplify the process, providing clear, actionable information and highlighting how AI-powered tools can make it easier than ever to obtain a compliant passport photo.
Whether you have a visual impairment, mobility limitations, or require the use of medical devices, this comprehensive guide will address your concerns and provide practical solutions. We’ll break down the core requirements, discuss acceptable accommodations, and showcase how AI-powered tools can streamline the process, ensuring your photo meets all official standards for 2024-2025.
Navigating the process shouldn't be a barrier to your travel or other essential services. Let's make sure your photo ID journey is as smooth as possible.
Understanding the Core Requirements for US Passport Photos
The U.S. Department of State has strict guidelines for passport photos to ensure they are suitable for identification purposes. These requirements apply to everyone, regardless of their physical condition. Here’s a breakdown of the standard requirements:
- Size and Dimensions: The photo must be 2x2 inches (51x51 mm).
- Color: The photo must be in color. Black and white photos are not accepted. See why in our article about Black and White Passport Photos.
- Background: The background must be plain white or off-white. Ensure there are no patterns or textures. Learn more about US Passport Photo Background Requirements.
- Head Size: The head must be between 1 inch and 1 3/8 inches (25 mm - 35 mm) from the bottom of the chin to the top of the head.
- Eye Visibility: Both eyes must be open and clearly visible. Glasses are generally not allowed unless medically necessary (more on this later).
- Expression: The expression should be neutral, with both eyes open and mouth closed.
- Attire: Normal day-to-day attire is acceptable, but uniforms or clothing that resembles a uniform are not allowed. Get our tips on Passport Photo Dress Code.
- Quality: The photo must be clear, sharp, and without any shadows or glare.
While these requirements might seem rigid, there are accommodations and strategies to ensure compliance while addressing specific needs related to disabilities. Understanding these accommodations is the first step to a successful passport photo.
Acceptable Accommodations for Various Disabilities
It's essential to know what accommodations are acceptable when taking a passport photo with a disability. The goal is to ensure the photo accurately represents your identity while respecting your needs. Remember, honesty and accurate representation are key.
Visual Impairments
- Eyeglasses: As a general rule, eyeglasses are no longer allowed in U.S. passport photos. If glasses are medically required, a signed statement from a doctor explaining the medical necessity may be required. If possible, it's best to remove glasses to avoid potential issues with glare or obscured vision.
- Dark Eyes: Ensure that your eyes are visible and that there are no shadows or reflections that obscure them. Proper, even lighting is crucial. Adjust your positioning or lighting to eliminate any dark shadows. Check our detailed guide on Dark Eyes Acceptable in Passport Photos?
Mobility Limitations
- Positioning: If you use a wheelchair or other mobility device, you do not need to include it in the photo. The focus should be on your face and upper shoulders. Ensure the background behind you meets the plain white or off-white requirement.
- Support Devices: If you require a support device to maintain posture, ensure it is discreet and does not obscure any facial features. A friend or family member can assist with positioning to ensure your face is fully visible and centered.
Head Coverings for Medical or Religious Reasons
- Medical Reasons: If a head covering is worn daily for medical purposes, you can wear it in your passport photo. Provide a signed statement from your doctor explaining the necessity of the head covering. The head covering should be plain and not obscure any facial features.
- Religious Reasons: Head coverings worn for religious reasons are permitted, provided they do not obscure the face. The full face must be visible, including the hairline. The covering should not cast shadows on your face.
Knowing these acceptable accommodations can alleviate much of the stress associated with the application process.
Specific Medical Devices and How to Handle Them
Many individuals rely on medical devices daily, and understanding how these devices impact passport photo compliance is crucial. Transparency and adherence to guidelines are most important here.
- Hearing Aids: Hearing aids are generally acceptable, provided they do not obscure the facial features. Ensure that the hearing aids are positioned so that they do not cast shadows or block the visibility of your ears or face. Proper placement and lighting can help avoid issues.
- Wheelchairs: As mentioned earlier, wheelchairs should not be visible in the photo. Enlist help to position yourself so only your face and upper shoulders are visible against the required background.
- Visible Medical Implants: If you have visible medical implants (e.g., a cochlear implant), they are generally acceptable as long as they do not distort your facial features or create shadows. Proper lighting is essential to minimize shadows and ensure facial features are clearly visible.
It's always best to aim for clarity and minimal obstruction to ensure your photo is accepted.
Actionable DIY Tips for Taking Passport Photos at Home
Taking a compliant passport photo at home can be more convenient and comfortable, especially for individuals with disabilities. Proper preparation and a few key adjustments can make all the difference. Here are some DIY tips to consider:
- Set Up a Proper Background: Use a white or off-white sheet or wall as your background. Ensure there are no patterns or textures. A plain background helps to emphasize your face without distractions.
- Ensure Adequate Lighting: Use natural light if possible. Avoid direct sunlight, which can cause harsh shadows. If natural light isn’t available, use two softbox lights to evenly illuminate your face. Soft, diffused lighting reduces shadows and glare.
- Use a Tripod or Get Assistance: To ensure the photo is stable and in focus, use a tripod. If you have mobility limitations, ask a friend or family member to assist with positioning and taking the photo. Stability and clear focus are crucial for photo acceptance.
- Take Multiple Shots: Take several photos to ensure you have a few options to choose from. Check each photo for clarity, lighting, and compliance with the requirements. More options increase your chance of finding a perfectly compliant photo.
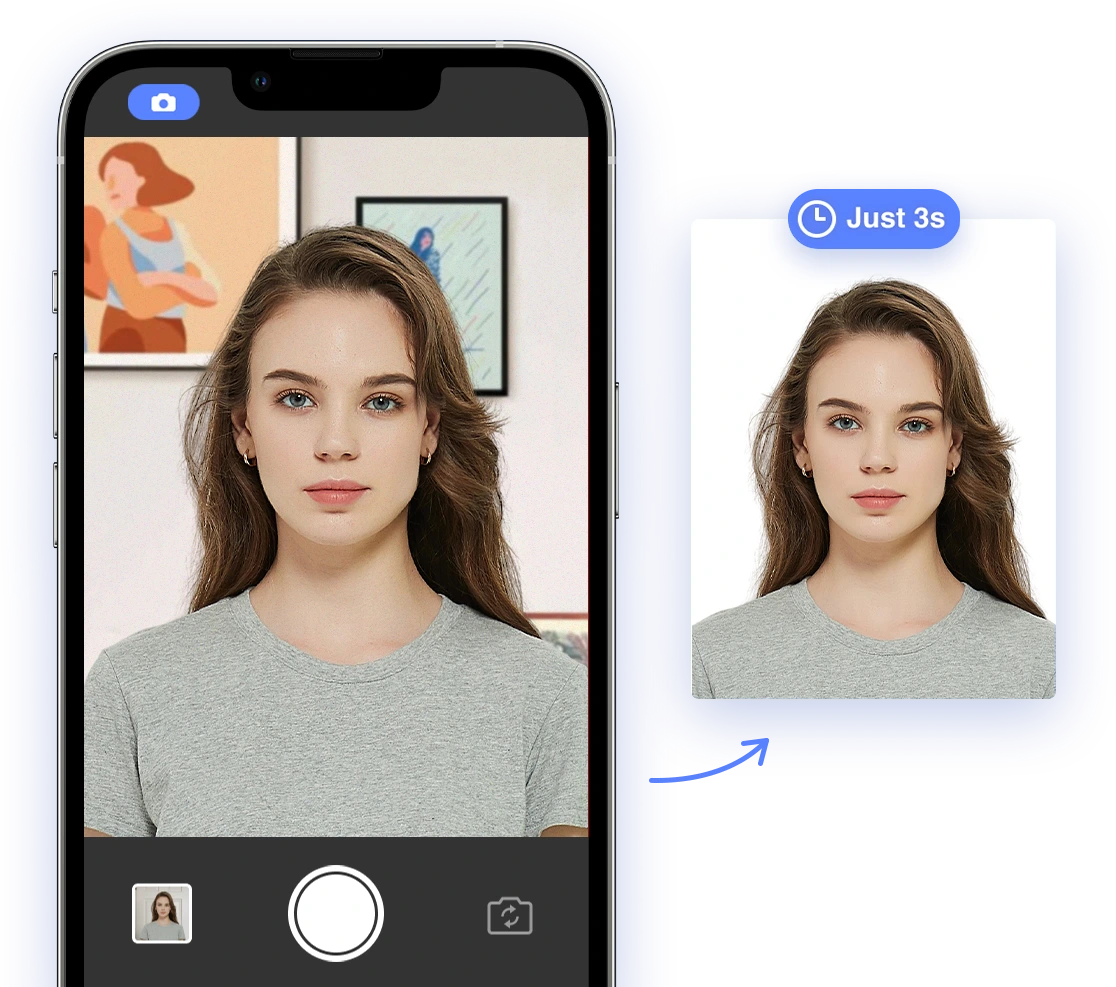
- Use a Reliable App: Utilize apps like AI Passport Photo to validate your photo against official requirements. This can save time and prevent rejections. These tools offer immediate feedback and adjustments.
Taking the photo yourself can offer comfort and control during the process.
AI-Powered Solutions for Simplified Compliance: AI Passport Photo
AI passport photo tools are revolutionizing the way people obtain compliant photos. These tools use advanced algorithms to automatically crop photos, adjust backgrounds, and validate compliance with official requirements. Utilizing these technologies can significantly ease the burden of meeting strict guidelines.
- Automated Cropping: AI tools automatically crop the photo to the correct size and dimensions, ensuring it meets the stringent size requirements. Check our guide on Passport Photo Size in the U.S.
- Background Adjustment: AI can detect and replace non-compliant backgrounds with a plain white one, which is crucial for meeting the background requirement.
- Compliance Validation: AI algorithms check the photo for compliance with all official requirements, including head size, eye visibility, and expression. This feature ensures the photo adheres to all standards.
- Accessibility Features: Some AI tools offer voice guidance and other accessibility features, making the process easier for individuals with visual impairments. These features provide real-time feedback and instructions.
By leveraging these AI-powered solutions, individuals with disabilities can streamline the passport photo process and ensure compliance with minimal effort. Explore different apps to find one that best suits your needs. Try AI Passport Photo now for guaranteed compliance!
Contingency Planning: What to Do If Your Photo Is Rejected
Even with careful planning, your passport photo might be rejected. If this happens, don’t panic. It’s a common occurrence, and there are clear steps to take. Here are the steps to take:
- Review the Rejection Notice: The rejection notice will specify the reason for the rejection. Read it carefully to understand what needs to be corrected. The notice provides critical insight into the specific issue.
- Correct the Issue: Address the specific issue identified in the rejection notice. This might involve retaking the photo with better lighting, adjusting your attire, or removing eyeglasses. Correcting the issue directly addresses the reason for rejection.
- Use AI Tools for Validation: Before resubmitting, use an AI passport photo tool to validate your corrected photo. This can help ensure that it meets all requirements. Validation provides an extra layer of confidence.
- Seek Professional Assistance: If you’re unsure how to correct the issue or if you continue to experience rejections, consider seeking assistance from a professional photo service that specializes in passport photos. Professionals have the expertise to handle complex situations.
Remember, rejection is not a dead-end. Follow these steps to resolve any issues and resubmit your application confidently. Our guide about What if my passport photo is rejected? could be helpful.
Case Studies/Examples
To illustrate common challenges and solutions, here are a few anonymized case studies:
- Case Study 1: Visual Impairment
- Challenge: An applicant with a visual impairment had difficulty ensuring their eyes were open and clearly visible in the photo.
- Solution: The applicant used an AI-powered tool with voice guidance, which provided real-time feedback on eye visibility. They also had a friend assist with positioning and lighting, ensuring the photo met requirements.
- Case Study 2: Mobility Limitations
- Challenge: An applicant with mobility limitations found it difficult to maintain a neutral posture for the photo.
- Solution: The applicant used a supportive chair and had a family member assist with positioning. They also took several photos to ensure they had a few options to choose from, selecting the best one for submission.
- Case Study 3: Medical Device
- Challenge: An applicant with a visible medical implant was concerned about it causing shadows in the photo.
- Solution: The applicant carefully positioned themselves to minimize shadows and used soft, even lighting. They also consulted with a professional photographer to ensure compliance before submitting.
These examples highlight that with the right approach and tools, most challenges can be overcome.
Assistive Technology
Assistive technology can significantly improve the process of taking passport photos, especially for individuals with disabilities. These tools help to bridge the gap and provide a more accessible experience. Here are a few examples:
- Smartphone Tripods with Remote Shutter: These devices provide stability and allow you to take photos without needing to physically touch your phone. A remote shutter minimizes movement and blur.
- Voice-Activated Camera Apps: These apps allow you to take photos using voice commands, which can be helpful if you have mobility limitations. Voice commands offer a hands-free solution.
- Screen Magnifiers: These tools can help individuals with visual impairments see the photo and ensure it meets requirements. Magnification ensures clear visibility of details.
Explore these assistive technologies to find what works best for your specific needs.
By understanding the requirements, utilizing available accommodations, and leveraging AI-powered tools, individuals with disabilities can confidently navigate the passport photo process and ensure their applications are successful. Taking a passport photo might seem daunting, but with the right approach, it can be a smooth and empowering experience. The key is to be informed, prepared, and proactive. Get started today and make your passport application process easier!
Related Articles
- US Passport Photo Requirements: A 2024-2025 Guide for All Ages & Situations - Learn about general passport photo guidelines.
- AI Passport Photo Tools: Your Comprehensive Guide to Global Compliance [2024-2025] - Discover how AI tools can simplify the process.
External Resources
- U.S. Department of State Passport Photo Requirements - Official guidelines for passport photos.
Image Requirements
- Image should be a high-quality photograph, not a scan of a photograph.
- The photo should be in focus and well-lit.
- The file size should be appropriate for online submission systems (check specific requirements of the system being used).
Schema Markup Suggestions
Consider using schema markup to enhance SEO. Here's a basic example:
{
  "@context": "https://schema.org",
  "@type": "Article",
  "headline": "Passport Photo with a Disability: A Comprehensive Guide to US Requirements & AI Solutions [2024-2025]",
  "description": "This comprehensive guide provides clear information and guidance for individuals with disabilities on meeting U.S. passport photo requirements for 2024-2025.",
  "author": {
    "@type": "Organization",
    "name": "AI Passport Photo"
  },
  "datePublished": "2025-09-30",
  "image": "URL_TO_YOUR_FEATURED_IMAGE"
}
Social Sharing Elements
Include social sharing buttons to encourage readers to share the article on platforms like Facebook, Twitter, and LinkedIn.