Applying for a passport?
Exciting! But let's be honest, the passport photo process can be a real pain. We've all heard horror stories – or maybe even lived them – of photos being rejected for the most bizarre reasons. From rogue strands of hair to unintentional smirks, the possibilities for passport photo fails are endless. This article celebrates those hilarious rejections while arming you with the knowledge to avoid becoming a cautionary tale yourself. Get ready for some laughs and some seriously helpful tips to ace your passport photo!
Anecdotes of Ridiculous Rejections
Let's kick things off with some real-life (or creatively re-imagined) stories of passport photo mishaps that are guaranteed to make you chuckle:
- The Case of the Glare-y Glasses: Sarah thought she looked fabulous in her new glasses, but the passport office disagreed. Turns out, the subtle glare reflecting off the lenses was enough to warrant a rejection. "I didn't even realize there was a glare!" she lamented. "Now I have to go without my glasses and squint!"
- The Shadowy Situation: Mark tried to be clever by taking his photo in what he thought was perfect natural light. Unfortunately, a rogue tree branch cast an unusual shadow across his face, giving him a perpetually sinister look that didn’t fly with passport control.
- The Accidental Smirk: Emily swears she wasn’t smiling, but the camera captured a slight upturn of her lips that was deemed an "unacceptable expression." Talk about being serious!
- The Hair-Raising Experience: David spent hours styling his hair, only to have his photo rejected because a single strand dared to cross his forehead. "It was just one hair!" he exclaimed. "One hair ruined my trip!"
These stories might sound unbelievable, but they highlight just how strict passport photo requirements can be. It’s not just about aesthetics; it's about accuracy and security.
Behind-the-Scenes Look at Photo Review
So, what exactly are passport officials looking for when they scrutinize your photo? It's more than just a quick glance. They're trained to assess a range of factors, all aimed at ensuring your photo accurately represents you and meets international standards.
- Facial Recognition Compatibility: Your photo needs to be compatible with facial recognition technology used at border control. This means proper lighting, a neutral expression, and a clear view of your facial features are crucial. These systems need to accurately identify you, and subtle discrepancies can throw them off.
- ICAO Standards: Passport photos must adhere to standards set by the International Civil Aviation Organization (ICAO). These standards cover everything from size and resolution to background color and head positioning. These universal guidelines ensure consistency across different countries.
- Fraud Prevention: Officials are on the lookout for any signs of photo manipulation or inconsistencies that could indicate fraudulent activity. Even seemingly minor edits can raise red flags.
Understanding these behind-the-scenes considerations can help you appreciate the importance of following the rules and taking your passport photo seriously. Compliance ensures not only acceptance but also contributes to global security efforts.
Common Mistakes and How to Fix Them
Now, let's get down to brass tacks. What are the most common reasons for passport photo rejection, and how can you avoid them? Knowing these pitfalls is half the battle!
- Incorrect Lighting: Photos that are too dark, too bright, or have uneven lighting are frequently rejected.
- Fix: Use natural light whenever possible, but avoid direct sunlight. Position yourself facing a window and ensure your face is evenly illuminated. A simple test: if you see harsh shadows, adjust your position. For more information, see our article about hair and passport photos.
- Non-Compliant Background: The background must be plain white or off-white and free of any shadows or distractions.
- Fix: Use a white sheet or wall as your backdrop. Make sure it's smooth and wrinkle-free. Ironing the sheet beforehand can make a big difference!
- Inappropriate Attire: Wearing clothing that blends into the background or items that obscure your face (like hats or sunglasses) is a no-no.
- Fix: Choose clothing that contrasts with the background and keeps your face fully visible. Religious head coverings are generally permitted, but they must not obscure your facial features. Think solid colors and simple necklines.
- Unnatural Expressions: Smiling, frowning, or making any other facial expression is likely to get your photo rejected. Remember the "accidental smirk" story!
- Fix: Relax your face and maintain a neutral expression with your mouth closed. A slight, natural smile might be acceptable, but it's best to err on the side of caution. Practice in a mirror beforehand.
- Incorrect Size and Dimensions: Passport photos must be exactly 2x2 inches (51x51 mm) with specific requirements for head size and positioning.
- Fix: Use a ruler or online tool to ensure your photo meets the precise size and dimension requirements. Many online tools will automatically crop your photo to the correct size.
- Poor Photo Quality: Blurry, pixelated, or low-resolution photos are a common cause for rejection.
- Fix: Use a high-quality camera or smartphone and ensure your photo is in focus. Check the resolution settings on your camera before taking the photo. Consider reading our article on taking passport photos with your iPhone.
DIY Photo Tips and Tricks
Taking your passport photo at home can save you time and money, but it's essential to do it right. Here are some tips and tricks to help you capture a compliant photo in the comfort of your own home:
- Use a Smartphone or Digital Camera: Modern smartphones have excellent cameras that are perfectly capable of taking passport-quality photos. Just make sure the lens is clean!
- Find a Well-Lit Location: As mentioned earlier, natural light is your best friend. Position yourself near a window, but avoid direct sunlight. Overcast days are ideal.
- Enlist a Friend: It's easier to get a good photo when someone else is behind the camera. Ask a friend or family member to take the photo for you. Plus, they can help you avoid the "accidental smirk."
- Use a Tripod: If you're taking the photo yourself, a tripod can help ensure a steady shot. Alternatively, prop your phone against a stable object.
- Edit Your Photo Carefully: Use a photo editing tool to crop and resize your photo to the correct dimensions. Be careful not to alter your appearance in any way. Focus only on size and cropping.
- Consider AI-Powered Tools: AI passport photo tools can automatically check your photo for compliance and make necessary adjustments. These tools can be a lifesaver if you're unsure about any of the requirements. See the section below for more details! If you're printing at home, check out our guide on how to print your passport photo at home.
Expert Advice
To provide some additional insights, we've gathered advice from passport photo experts and travel bloggers:
- "Always double-check the specific requirements for your country's passport photo. Regulations can vary, so it's essential to stay informed." - Travel Blogger, The Wandering Lens
- "Don't be afraid to take multiple photos. The more options you have, the better your chances of finding a compliant photo." - Passport Photo Expert, Photo ID Pros
- "If you're unsure about anything, it's always best to err on the side of caution and seek professional help or use a reliable AI tool." - Travel Advisor, Globe Trekker Inc.
Visual Examples
To illustrate the dos and don'ts of passport photos, here are some visual examples:
- Rejected Photo:
 (Image of a photo with shadows, a slight smile, and incorrect background - Placeholder URL, replace with actual image) - Reason: This photo has multiple issues including shadows, a slight smile, and the background is not plain white.
 - Compliant Photo:
 (Image of a photo with even lighting, neutral expression, and plain white background - Placeholder URL, replace with actual image) - Reason: This photo has even lighting, a neutral expression, and a plain white background, meeting all requirements.
Seeing these examples side-by-side can help you visualize the difference between a rejected photo and a compliant one. Pay close attention to the details! You can also read International Civil Aviation Organization (ICAO) website.
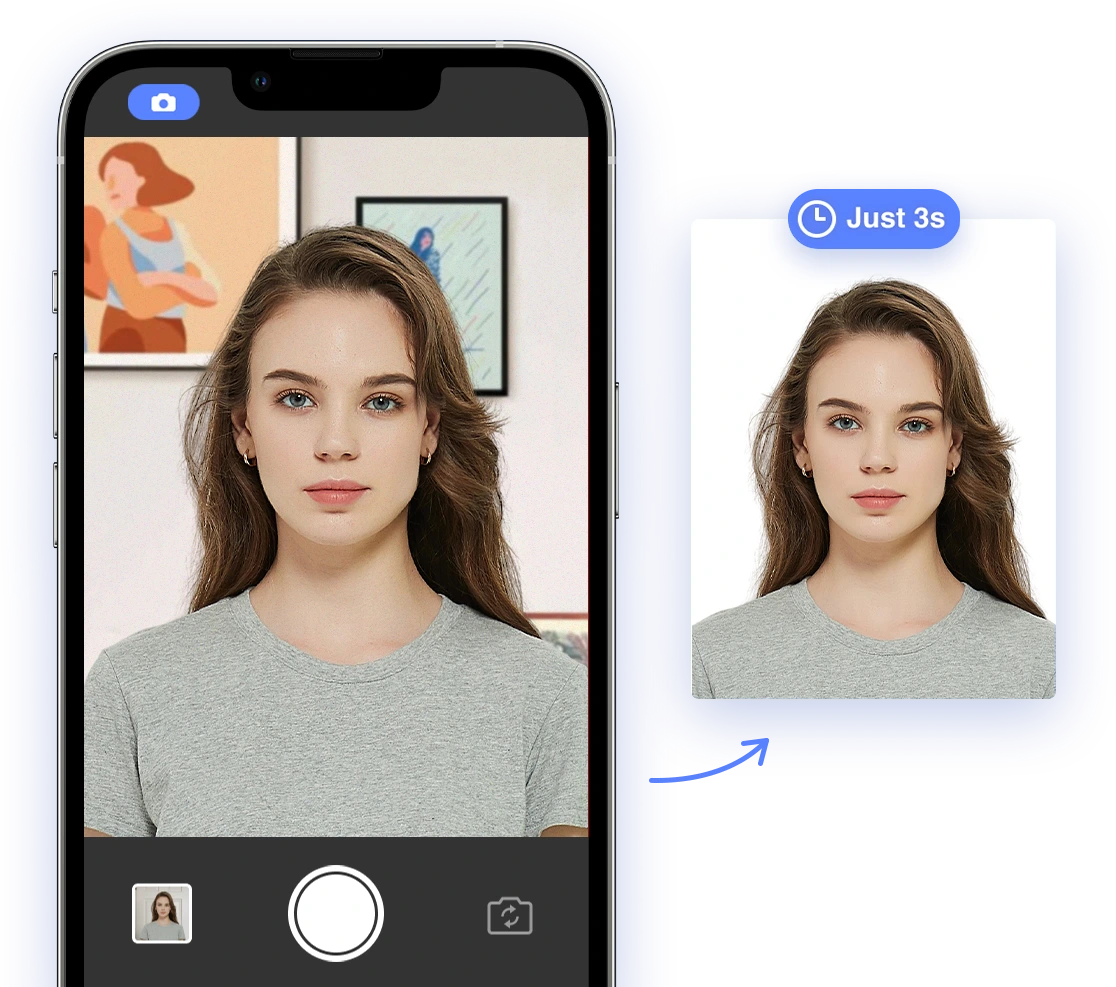
Say Goodbye to Passport Photo Stress with AI Passport Photo
Ready to ditch the stress and uncertainty of passport photos? AI Passport Photo is here to help! Our AI-powered tool makes it easy to create compliant photos quickly and easily from the comfort of your home. Simply upload your photo, and our system will automatically check it for compliance with all official requirements. We'll even make necessary adjustments to ensure your photo is perfect.
- Guaranteed Acceptance: Our AI technology ensures your photo meets all official requirements, minimizing the risk of rejection. We stay updated with the latest regulations.
- Easy to Use: Simply upload your photo and let our system do the rest. No complicated software or technical skills required.
- Save Time and Money: Avoid expensive photo studios and take your photo at home, on your own schedule.
- 24/7 Availability: Create your passport photo anytime, anywhere, with an internet connection.
Don't let passport photo fails ruin your travel plans. Try AI Passport Photo today and experience the difference!